DIY: Boho Tulum Inspired Macrame Swing

Well you guys... this post has been a long time coming. I made these swings AND took all the videos and photos for a DIY blog post back in August (2017). And I kept meaning to post about it but then it was winter and I thought- who would need to make a macrame swing in for their backyard in the middle of winter? So here we are! This may be the longest I've procrastinated doing a post.

(This was a pic from the day I finished making these. See? It was FALL.)

photo by Chelsea Rochelle Photography

These swings were inspired by our trip Tulum last summer. Everywhere you go there are swings and hammocks. EVERYWHERE. And you'll also find swings as chairs at bars. We had to mimmick the lounge-y-ness of Tulum in our own backyard. We want it to be an oasis!

For more backyard inspiration check out these posts:
- DIY Stock Tank Pool: Everything You Need To Know
- DIY: Faux Cement Tile For Under $200
- 2 Hour DIY Copper and Wood Coffee Cart

For this project, you will need:
- 2"x8"x6' piece of wood
- Rope
- Hammock Hanging Kit
- Sealant
- 3/4 inch Spade Bit
- Drill

This DIY has a lot of steps, so I went ahead and created a video about how to make one of these swings yourself!

Or if you'd like to read the instructions, see the steps below!
STEP 1 // PREPARE THE SWING SEAT.
First, measure your wood to 24 inches, you can make your swing seats as wide or narrow as you’d like, but 24 inches seems to be pretty universal for adults and children.

Cut the wood with a miter saw. If you don’t have a saw you can ask your hardware store to cut it for you.

Next you’ll want to sand all the edges.

Measure one inch from each edge on the corners and mark an ‘X’ where the two intersect.

Take your drill with a 3/4” spade bit attached and drill holes on each corner using the X as your location for starting.

Next I sealed the wood with a Matte Finish. You can paint or stain your seats first if you want to.

STEP 2 // CREATE THE MACRAME PIECES.
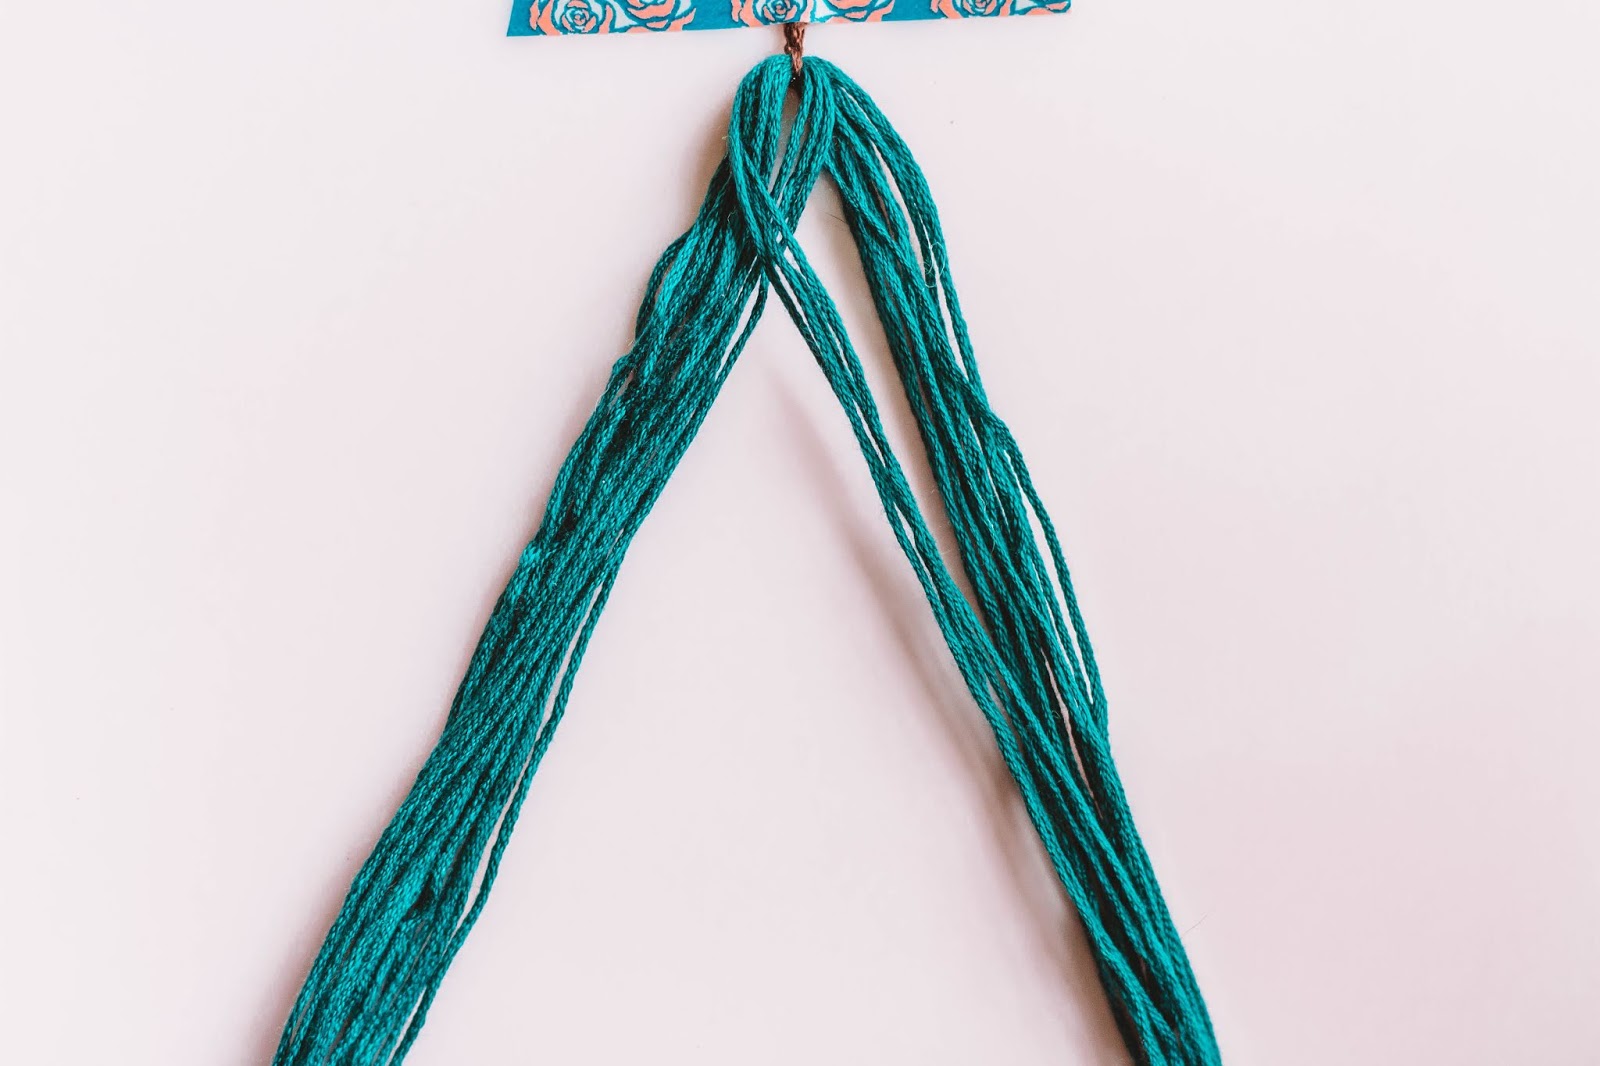
Now it’s time to measure your rope. Each swing needs 6 pieces of string in this length. I measured about 260” for 4 of the pieces and the other two I measured about 150”.

(You’ll want to make sure that you string does not stretch. Mine had a little stretch and it made it a little more complicated when attaching the seat. This nylon rope would be best, but if you string stretches a little, it’s not the end of the world.)

This is the kit I bought to hang the swings. You will need this before you start as the carabiners in here will be the base of the actual swing. We are going to take the carabiner that came in your hanging kit and attach the ropes to it. You should have 2 carabiners per swing.

Fold the short piece of rope in half and then put the loop in the middle through the front of the carabiner. Then reach through the loop from the back of the rope and pull the front strings through the loop. Repeat this three times on each carabiner.

For the longer outside pieces you will want to fold the rope where the inside piece is about 75” long. This will make the outside pieces way longer than the rest, but this is what you want.

Now each carbabiner should have 6 pieces of rope hanging down. We are going to use the outside two pieces to create the macrame design.

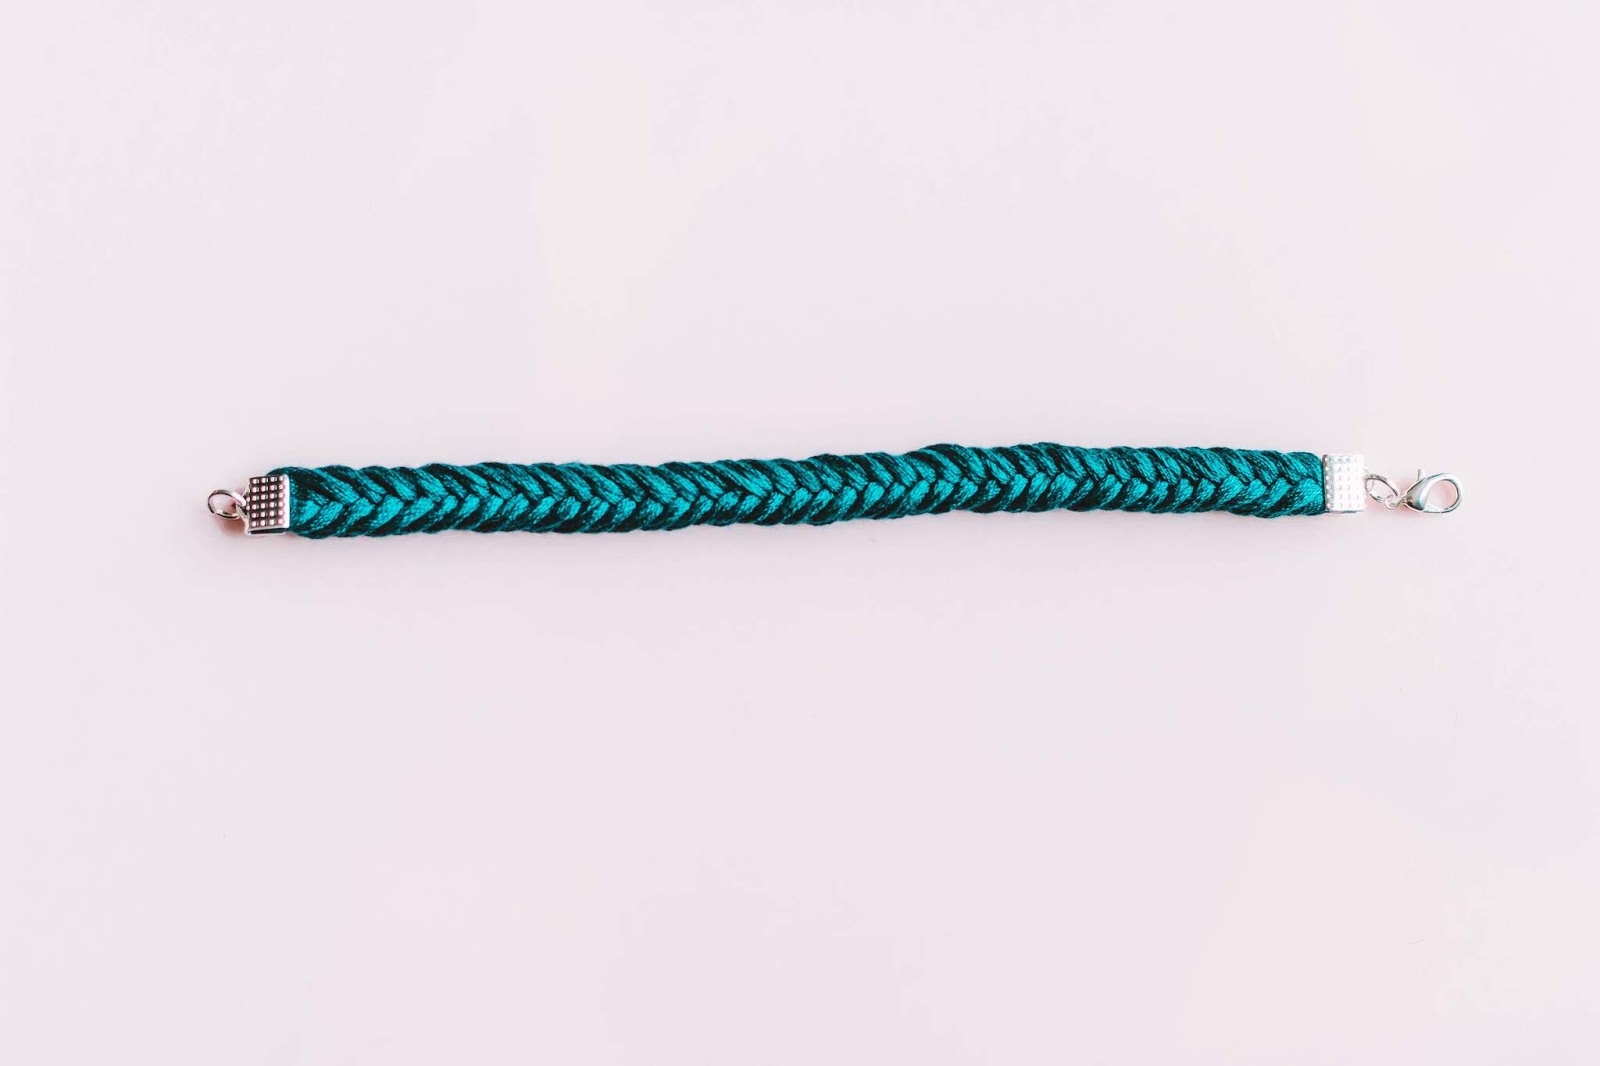
We are using one simple knot over and over again. 

First take the piece of rope that is furthest left and place it over the other ropes creating a ‘4’ shape.

Place the rope that is furthest right over the left string and then under the middle ropes and then through the loop of the ‘4’. Then pull both ropes to tighten the knot all the way to the top.

You will repeat this same knot over and over again until you reach the length you need. The design will start twisting and it’s okay- that’s exactly what you want.

Before you get to the end you will want to know how long your macrame pieces should be. To figure this out you will need to measure from the place you will be hanging your swings to the ground. You will also need to know how high off of the ground you want the swings to sit. Subtract this number from the other and you will have an idea of how long your macrame pieces will need to be. Make sure to keep in mind that you also need to consider the length of the carabiner in that number. 

When you get about 8 inches away from the length you need, stop tying knots and split the ropes into two groups. Braid each group with a regular three strand braid and then tie a knot or two at the end of each. You want to make sure these knots do not fit through the holes in the wood.

STEP 3 // ATTACH THE SEAT AND MACRAME PIECES.
Now it's time to attach the rope to the seat. I wrapped the ends of each rope section with tape so it could more easily fit through the holes.


Once you get the ropes through, tie a knot right on each rope right under the wood. (If you rope has stretch like mine did, you'll want to tie the knot a little loose so you can stretch the swing out a little. You can do this by installing your swing and then sitting on it. It will not un-stretch out so once you've fully sat on it and stretched it out you can adjust measurements accordingly and move to the next steps.) Once you are certain your measurements are right, tie the knot really tight. You may even want to tie two knots.

Next you'll tie the two ropes on each side together. This would be easiest with another person to hold the rope down while you tie the knots really tight.

To make it seem a little nicer we are going to grab a scrap piece of rope to finish. Start by grabbing all the ropes and adding the scrap piece of rope. Make sure that the end of the rope is further up that the knot. Loop the scrap piece upward and grab both of the pieces together. Then start wrapping loose section around all of the ropes. There should always be an end hanging out at the top and a loop hanging out at the bottom.

I wrapped this around about 6 times but you can make it as long or short as you'd like. Once it's as long as you want, take the end of the section you've been wrapping and put it through the loop at the bottom. Then grab both ends and pull. The loop will be pulled up into the wrapped section. Cut the top end off and you should have a pretty neat finish. Trim the ropes to all the same length if you'd like.

STEP 4 // HANG THE SWING UP.
Measure the distance between the holes on each side of your seat to know how far away to hang the hooks from each other. Measure this out wherever you are hanging your swing. Check your packaging to see what size drill bit you need. Drill holes where you have marked. Install the hooks by hand. I used a screwdriver to help twist the hooks in. Once the hooks are in, attach the carabiners to the hooks and you are done!

7 Reasons to Visit Your State Parks

While Savannah + I were camping recently at Pennyrile Forest State Park in Kentucky, I had this realization -we are so lucky to have access to all of these beautiful state parks. In the United States, there are over 10, 000 state parks! So most people in America have access to these gems. Between hiking and our new found love of camping, we've visited a lot of them in Tennessee + Kentucky! I haven't really started appreciating them until the last couple of years. Today we're telling you 7 reasons why you should give your state park a visit.

You may also like:
- The 21 Best Things For Camping Comfortably
- 6 Tips For Your First Camping Trip
- How To See A Rainbow At Night

1. They are free/cheap. A lot of state parks are free and if they aren't the entrance fee isn't a lot of money. Part of our tax dollars go to our state parks, so we might as well take advantage of them!

2. They are beautiful. There is something significant about disconnecting from the urban jungle and standing in a forest full of trees or looking at a beautiful waterfall. Also, if you are into photography- what's a better back drop than nature?

3. They offer a variety of activities. Lots of state parks have a variety of activities from spending time on water to disc golf, regular golf, miniature golf, hiking trails, biking, volleyball, playgrounds, etc. If you have kids in your life or you are bored one day- go to a state park! And check their calendars because a lot of state parks offer seasonal activities.

4. They have camping sites. Going camping in nearby state parks has been one of my favorite new ways to relax. I didn't grow up camping and I would have never thought I would have become a camper, but I love it. State parks have some of the best camping options around. I actually prefer them over private campgrounds. Most of them have water + electricity at their campsites which is really nice if you want to camp comfortably (our preferred way to camp).

5. They are good for your state. There are a variety of economic and environmental benefits to having state parks. They provide jobs. When people use them they are more likely to be healthy, and they are good for local businesses. State parks connect people to the environment, therefore making them more likely to care about it. Everybody wins when people start caring about the environment! (I got a lot of this information from this website.)

6. They are good for you. There is no question that spending time in nature is good for your health. Here are several articles that talk about the benefits in more detail and have the research to back up their claims 1/2/3. The general gist is that spending time outside is good for your mental + physical health. State parks in our area don't seem to have the greatest cell phone reception which initially seems frustrating, but is really a blessing. Disconnecting from our phones is most certainly good for our health.

7. They are good for your relationships. This may seem like a stretch but spending time with friends + family in nature can be a great way to bond. There is something to be said about stripping away the technology, disconnecting from our jobs and taking a walk in nature together. There is a simplicity to it. Taking most of our comforts away gives way to conversations that matter and last.

We hope this post has encouraged you to get out in nature and visit some beautiful parks around your neck of the woods! If you would like to see more posts like this, leave us a comment below!

- Casey

Road Trip Travel Guide: Asheville, & Charlotte, North Carolina

This is a sponsored conversation written by me on behalf of Visit NC. The opinions and text are all mine.


As bloggers one of our main goals is to create content that inspires + encourages others. In order to be able to do this, we too must find inspiration. There are a few different actions we take when we feel our creative reserves getting low, and one of the most beneficial things is travel. It's where we get to experience something different when we've been staring at the same skyline so long its shape is burned into our brains. It's where we take a chance and taste something for the first time. It's where we learn of things that we never knew existed before. It's where we get to be inspired and find those Firsts That Last.
Last week we had the opportunity to explore North Carolina on a sponsored trip with Visit NC. Neither Savannah nor I had ever visited North Carolina before, so we were excited to spend time there. Today we are sharing some of our favorite places we visited on our trip from Nashville to Charlotte. Each place inspired us in some way and we were able to experience a lot of new things.
On our way to Charlotte we stopped in Asheville for the day. This is where we found our first gem, Flora(pictured above). It's a coffee shop/ cut flower shop/ house plant shop and it's completely gorgeous. Every little detail and piece of decor creates a fresh and magical vibe. We wandered around the store for a while and only could make ourselves leave when we came to the conclusion that we could not buy any more house plants- even though they had many we wanted. We left Flora feeling creatively inspired.
We got to Charlotte at night and crash in our adorable and affordable Airbnb. Our host, Erica, was great and provided us a lot of information about Charlotte. We spent our first full at The U.S. National Whitewater Center (pictured above + second picture in blog post). This place is an adventure seeker/outdoor lover's paradise, so we felt right at home. They have a man-made whitewater river, ropes course, zip lining, rock climbing, kayaking, and paddle boarding. What is so great about USNWC is that there is something for everyone and for all fitness levels and all ages. They also do a concert on the river which we were lucky enough to witness while we were there.

We really loved the energy at the Whitewater Center. Everyone is having a blast as they try new things. Zip lining was one of the parts we loved the most. Flying through the air is a pretty incredible feeling. Casey had never zip lined or gone whitewater rafting before.
The next day we drove 45 minutes from Charlotte to Mooresville, NC to visit Carrigan Farms. They have a rock quarry (pictured above) where you can swim and on a hot summer day. What's better than a great swimming hole? At different times of the year you can pick apples, strawberries, pumpkins, and asparagus. I really wish we could have been there for that but we were happy to be able visit and take a dip.
After visiting Carrigan Farms we made a quick stop downtown Mooresville and visited a few antique shops. Our favorite one was WFV Designs. This is definitely one of Casey's favorite things to do. There was also a little coffee shop in the area if you needed a little pick-me-up.

We made our way to Hello, Sailor (outdoor patio pictured above) for dinner which, now, might be one of my favorite restaurants of all time. I don't say that lightly. The food, service, decor, and atmosphere were incredible. We also got to experience another first- eating crab claws. We enjoyed our meal while sitting by Lake Norman sipping on beautifully mixed cocktails.
We left Hello, Sailor feeling inspired on so many levels. I know that sounds cheesy! There is something about eating a delicious meal in a beautiful space that leaves you feeling that way. Not many restaurants can do that.
See? It's just lovely.
Our last full day of our trip we took a short 20 minute drive Belmont, NC. Our first stop was the Muddy River Distillery. They only do tours on Saturdays, and we highly recommend going if you can. We got to try 5 different rums and they were honestly delicious. Neither of us drink very much and we certainly can't just sip straight liquor on the rocks, but I think with this rum I really could.

We loved hearing about how the distillery started and what makes them stand out from the rest. We bought a bottle of the coconut rum and basil rum and I'm already wishing we would have bought more. Muddy River is a very small distillery run by a tiny crew of people who are just trying to live their dreams. They have achieved a lot and we left feeling inspired to keep chasing our dreams.
Also while in Belmont we strolled around their downtown which is adorable. I mean check out this specialty grocery store (pictured above). I think North Carolina is the land of adorable small towns. We enjoyed walking around and we ate lunch at Nellie's Southern Kitchen which is owned by the Jonas' Brother's parents. So if you're a fan you have to go and visit. They have a wall full of Jonas' Brothers memorabilia. Also, their food is really good :)
The last place we visited in Belmont was Daniel Stowe Botanical Gardens. If you follow us on Instagram, you know we are really into plants, flowers, and gardening in general. We knew we had to come here, and it did not disappoint. My favorite part was their butterfly garden which is an enclosed space full of plants + flowers that butterflies love. We saw several different varieties of butterflies. Better yet there were really butterflies everywhere. We left the gardens feeling inspired to plant even more pollinator friendly plants next year.
The next day as we headed back to Nashville we took a detour so we could drive through some of the Blue Ridge Parkway. It only added an hour to the drive and it was totally worth it. We stopped by Blowing Rock (pictured above) and ate breakfast in Boone, NC. Our favorite part was the weather in Boone, 61 degrees in the middle of summer! We left the parkway and the mountains feeling inspired to come back and go camping along the Blue Ridge Parkway.
Here are a few other places we visited that we loved:
- King Daddy's (Asheville)- They gluten free chicken + waffles!
- Trade and Lore (Asheville)- Love the decor + vibe here.
- Whist (Asheville)- The perfect place to buy and non-cheesy souvenirs.
- Southbound (Charlotte- pictured above)- Loved the decor + food here. They have tacos + other Tex-Mex options.
- Smelly Cat Coffee (Charlotte)- This has been around Charlotte or a while and is a local favorite. It's unique + that's why we liked it :)
- McGill Rose Garden (Charlotte)- This is a free garden full of roses that the City of Charlotte maintains. We absolutely loved it!

Overall, we left our trip to Charlotte feeling like our inspiration tanks were filled up. We definitely want to come back to North Carolina and spend more time in the mountains and we would really like to get out to the Outer Banks. Thank you to Visit NC for sending us on this trip and letting us experience your beautiful state! If you are visiting the beautiful state of North Carolina, you should definitely check out their website. We used it a lot when planning our trip.

xo, Casey and Savannah

The Fastest Grown-up Friendship Bracelet Tutorial

Some of our most popular posts on this blog are about friendship bracelets! We've made some complicated ones and we've made some really easy ones. But today we are going to talk about something a little different- how to make a grown up looking friendship bracelet.

You may also like:
- The Fastest Friendship Bracelet Ever
- A Crazy Complicated Friendship Bracelet
- DIY Heart Friendship Bracelets

I think we all understand that sometimes a friendship bracelet can look juvenile. But with this tutorial you can keep wearing matching bracelets with your besties even as you get older.

Things you will need:
- Friendship Thread
- Scissors
Tape
- Jump Rings
- Metal Crimps
- Lobster Claw
- Chain
- Jewelry Pliers

This KIT has almost everything you need.

The main key to grown-up friendship bracelets is creating the whole thing with only one color. And once we get to the end we are going to finish it like a real removable bracelet so it seems professionally made. People really may think yours is store-bought! Let's get started.

Step 1. Unravel the whole pack of thread in the color you will be using. Fold the thread in half 4 times and either tie a knot at one end or tie a string around the center. Tying a string around the center of the group of strings uses less space and makes it less bulky. Then cut the opposite end of the string to release all the folds.
Step 2. Separate the strings into two equal sections. Take a group of 4 strings on the right and separate them from the rest.
Step 3. Add the group of strings to the left side.
Step 4. Take a group of 4 strings from the outside of the left group (make sure these aren't the same strings you just brought over from the other side).
Step 5. Add those strings to the right side.
Step 6. Repeat steps 2-5 over and over until your bracelet is as long as you want it to be.
Step 7. Use tape to tie up the end rather than tie a knot. We really want to keep the bracelet as flat as it can be for the finishing process.
During this process we will be able to lengthen the bracelet if it isn't long enough to fit around your arm. Make sure you have jewelry chain if that's what you are wanting to do. Read more depth instructions on this in this post here.
Step 8. Cut the string that is tied around the bracelet right next to the knot. Put a metal crimp over the end of the bracelet.
Step 9. Use the jewelry pliers to clamp the crimp down.
Step 10. Cut off the other end, but make sure to leave a section with tape to hold everything together. Then place the metal crimp over then end and use the pliers to clamp it down.
If your bracelet doesn't need any length added you will need 2 jump rings and 1 lobster claw to finish the bracelet. If you need a little length added you will need to add chain and a jump ring. You can see more about this here.
Step 11. Attach the jump ring and lobster claw to one side and a jump ring to the other side.
And there you have it! A removable grown-up friendship bracelet. If you are looking for something a little smaller, check out this post. And if you are looking for something a little more complicated check out this post!

If you liked this post and would like to see more like it, join our e-mail list here. And don't forget, we love it when you pin our pics to your Pinterest account!

xo, Savannah

**This post contains affiliate links.**