Before and After: A Moody Boho Sitting Room

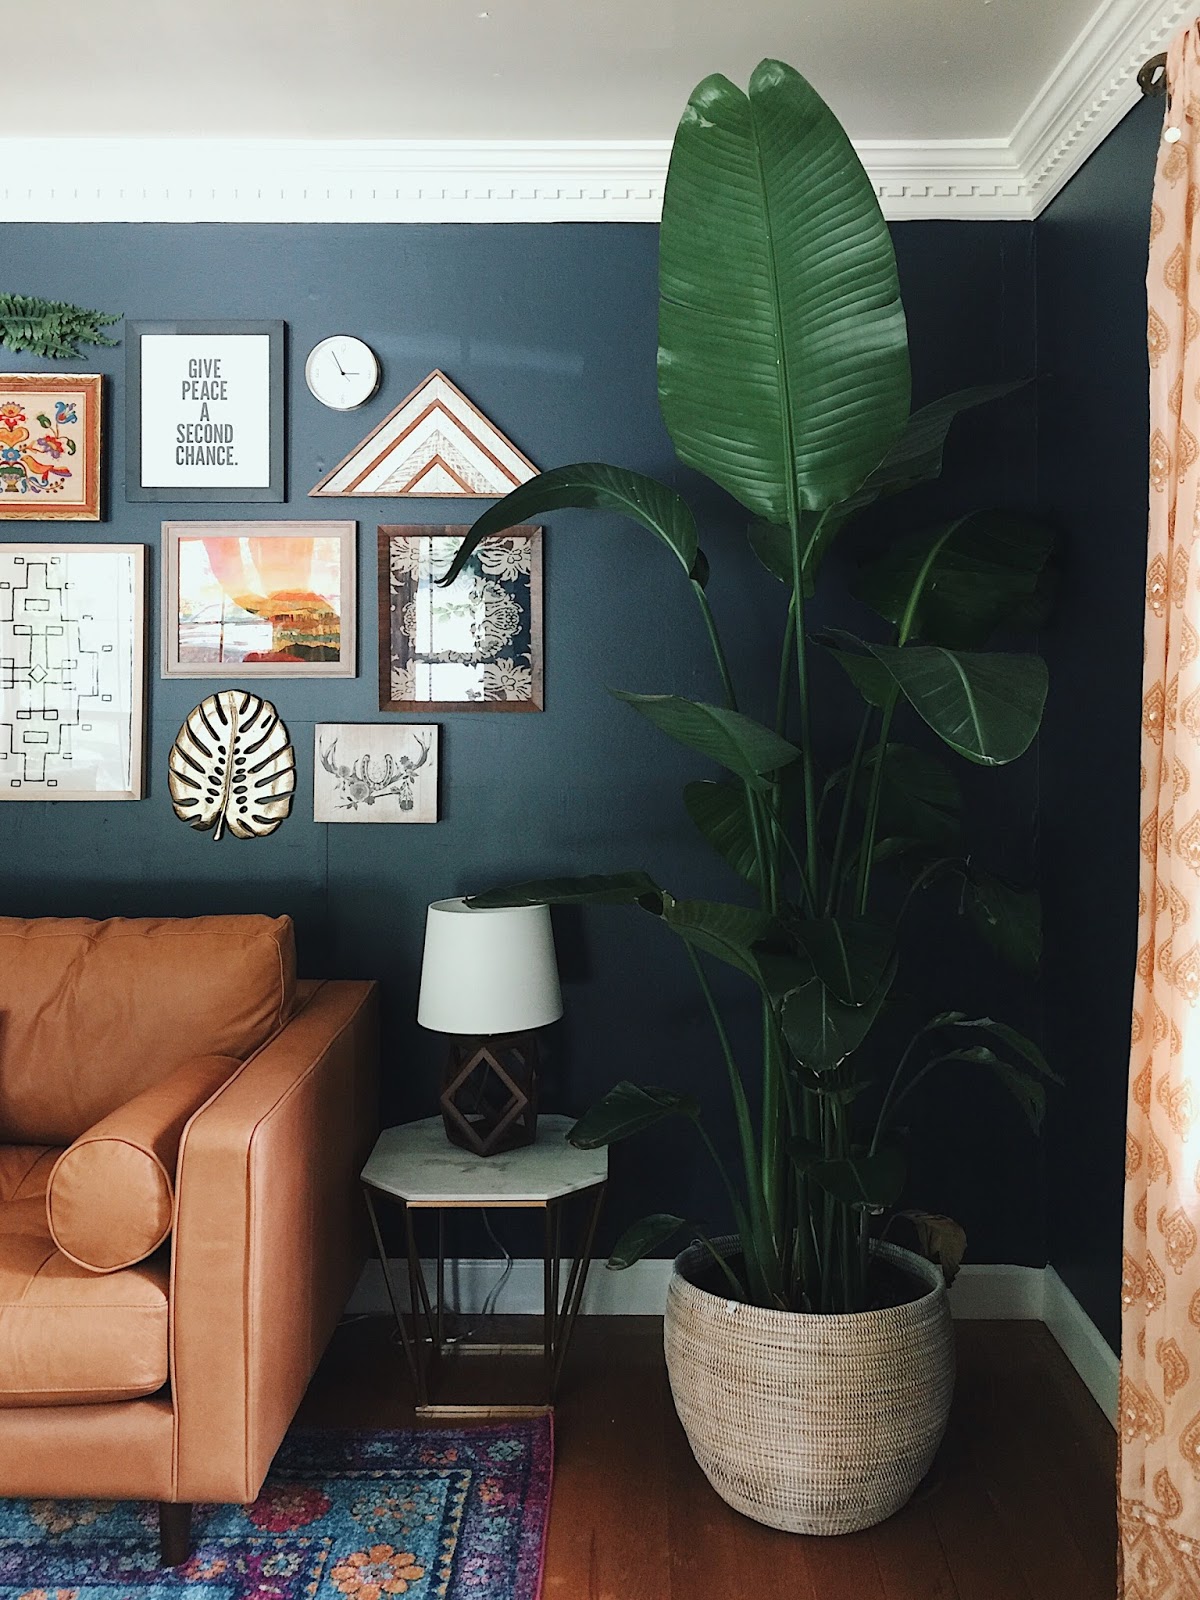
Of all the rooms we have decorated this is probably our favorite one to date and it's not even in our own house! The before and after is a drastic change from one style extreme to another. We took the walls from pale yellow to navy blue. From 90s decor to the 70s and back to 2017. There is definitely a 70s vibe going on here, but the dark walls make the room more modern. The clean lines give the a couch a midcentury modern feel, but that is offset by the bohemian style pillow in the middle. There is definitely a mixture of old and new which is what gives this room a very eclectic but cozy feel. This room took a while to come together but we think the result is stunning (if I do say so myself).
This room could handle such a dark color because there is so much natural light. But with such dark walls, we knew that we wanted to keep a lot of the accessories light and airy- specifically with the curtains. These windows are one the greatest features of this room, so we really didn't want to weigh them down with heavy curtains.
We forgot to take the "before" pictures before we took some of the bulky furniture out of the room. Here you can see we had already put the rug down. :) I am glad we were able to get some "before" pictures anyway, even with the couch gone. Picture a massive dark brown leather sofa in this room with a round wood coffee table. 
In some ways it was hard to let this rolling desk go. The desk is in great shape and I really like the look of it. However, it was too big for this room and was just being used as a place to store junk. 
These french doors are (insert praise hand emojis here) fab! Savannah and I tried to figure out where we could install french doors in our house somewhere (we do have some in our studio that open to the deck). We just LOVE having them as interior doors. Unfortunately the paint color doesn't really show up very well but the color is a very pale muted pink with a tiny touch of purple. 

The light blue color on the wall was a color we considered using but decided to go with the navy instead. We had bought the rug and when we rolled it out we realized that a light blue color would be too "sweet" feeling. 
This gallery wall. Bless. This is definitely what took the longest to put together- the longest in acquiring the pieces and the longest assembling. I wish I could tell you some easy way to layout a gallery wall. All I can tell you is to lay everything out on the ground and keep moving pieces around until it looks right. :) One tip I do have is to have a variety of shapes and sizes. When we first laid out everything we had, we quickly realized we had too many of the same shape + sized pieces. It just wasn't working. This wall is a mixture of old and new things which I think is another tip for a great gallery wall. 
The bookshelf was our last thing to style because we had spent so much time + energy gathering the pieces for the gallery wall. After that was complete we were able to shift our attention to finding the right pieces for this bookshelf. We found the books on the bottom shelf at yard sale- $3 for all of them. They are a collection of Readers' Digest stories which our client enjoys reading, and they also look really great. 
These rattan chairs were a great find and were only $60 for the pair. Savannah made new cushions for them with a fabric we have used in our own house. We weren't 100% sure they were going to be right when we bought them, but we are glad we took a risk. Again, we didn't want a big heavy chair blocking the view of those windows. 
Well we hope you enjoy this room as much as we do! We tried to list as many of the items from the room as possible. If it's not listed below, then more than likely it was a vintage find.

Paint (walls): Benjamin Moore Hale Navy
Paint (french doors) Benjamin Moore Wild Aster
Rug: Rugs USA
Coffee table: We are not saying because it's horribly made and no one should buy it. Buy this one instead.
Side tables: Justina Blakeney 
Curtains: Urban Outfitters
Bookshelf: Target
Horse Bookends: Gas Lamp Too (Similar)
Floor lamp: Target
Lamp: Target
Rattan chairs: Miss Lucilles (Similar)
Chair cushions: DIY'ed made from Nate Berkus fabric
Chair pillows: Anthropologie
Long couch pillow: Anthropologie
Couch: Article
Woven basket planters: Welcome Home Shop
Blanket ladder: World Market
Hexagon mirrors: Apple + Oak
Wood triangle (gallery wall): made by 1767 and purchased from Apple + Oak
Peace art (gallery wall): Spring
B+W framed textile: Spring
Dreamcatcher: Vintage Rubia
Willie Nelson picture (gallery wall): DIY (found picture online and had it printed at Staples) frame from Michaels

Where You Should Eat In Tulum

Where to eat

Let me start by saying that there is no wrong place to eat in Tulum. As far as we know. You're going to search the web and see 20 restaurants that different people say you have to go to. And there are even more than that to explore.
But our highest recommendation goes to Hartwood. You will read all different kinds of reviews on this restaurant, but there is no denying that the food could make you cry, it's that good. I had an empanada appetizer that I'm still dreaming about.
I'm not going to lie. We didn't have the greatest service we've ever had. Our server was never rude but he was disinterested at best. Casey and her mom ate here last year and they had outstanding service + food. Honestly, the food is so good that unless your server spits in your face, you can't even care. 
Here is that life changing empanada and a jicama salad.
The menu changes daily, but there is always a meat option, tons of seafood options and plenty of vegetarian options. Your server will explain each thing on the menu for you, so don't be afraid to ask questions. Also, don't skip out on dessert! We all shared a coconut cake and Casey got their house made coconut and corn ice creams.
We ate here at El Pez 4 times. Yes you read that right. FOUR times. 3 times for breakfast and 1 time for dinner. El Pez was obviously worthy of eating at multiple times, but we do regret eating breakfast there so many times because there are so many amazing options. However, after we ate there the first time, the location + the setting + the service were so exceptional we made this our go-to breakfast spot. The food is excellent as well (get the omelette of avocado toast) but this place is the total package. A big bonus was they do free refills on coffee :) Most places charge by the cup.
We loved the decor at El Pez so much we wanted to move in!
Also, their tableware was so dreamy. Casey asked where she could buy the pieces and apparently they get asked that a lot. Unfortunately they got them somewhere in Europe (I think that's what they said) so we weren't going to be getting our hands on them while on this trip.
At dinner they also offer a cocktail flight, so you can try 3 different drinks! Great for the indecisive one. (Also they have a cocktail called Dear Mr. Trump. We kept meaning to get a picture of it, but never did.)
Juanita Diavola is located right next to Coco Tulum and is part of the hotel. We ate here for breakfast once and dinner once. Casey had chia seed pudding that was life-altering. As soon as we got home she started making chia pudding. This one was made with mango so it wasn't milky like a lot of chia puddings are. They also make oven fired pizzas that are massive and delicious. It was great to be able to walk 10 seconds out our door to the restaurant.
A good thing to keep in mind- all restaurants in Tulum are open-air, but it's amazing. You can't beat the ambiance that the jungle and ocean naturally create. The night we ate at Juanita Diavola was the only night it rained and we had to take cover at the end of dinner. By the way, that is not a complaint at all, it's just part of the experience!
The Real Coconut is healthy food lovers' dream. The entire restaurant is gluten free which is perfect for Casey since she can't eat gluten. The make their own coconut tortillas and tortilla chips and now you can buy them at Whole Foods!
The whole time while we were in Mexico Casey kept saying she wanted pancakes (gluten-free) and on our last day she got her wish. This was the only place that we found that had them! I had eggs and crispy coconut tortillas, with avocado and tomato sauce, but can't remember what it was called. The tortillas were great if you are looking for an alternative to wheat, rice and corn.
The Real Coconut is located in the Sanara Hotel and it's right on the beach, so the view was exceptional. It was the perfect place to eat just hours before we had to board our plane.
Raw Love Tulum is a cool little vibey place that is in the jungle, but also right on the beach. It's near and/or apart of Ahua Tulum. There are hammocks everywhere and it's a great place to hang and get a juice or a vegan treat. We had some coconut carrot bites that were delicious! Actually, I can't remember exactly what it was we had, but they were sooooo good. Definitely get one of their desserts.
La Zebra was delightful. They have a beach club that we went to one day. They had a pop-up bar from NYC there while we were there, but I think it ended in May. We had a pina colada and we each had a fancy custom drink, both were great. Nothing beats sipping a great cocktail while on a beach bed staring at the ocean. La Zebra also had exceptional service.
Ki-Bok is a coffee shop in town. You can sit in the garden area to order and eat breakfast or you can just order a latte at the counter. The food was good, but the little garden stole the show. It was intimate and cute and full of all our favorite plants. This place was a block away from our Airbnb and is really in the center of everything in town.
Even though there are so many great restaurants on the beach strip, eating in town is way more affordable and you just can't go wrong. You definitely don't want to skip this part. There are plenty of restaurants to choose from, and if you just want to grab some street tacos, they are cheap and completely delicious. We had some $4 giant mojitos somewhere that were perfect. This is a normal drink price in town.
 And there are a few things you should definitely get in Mexico, wherever you can find them-
1.Guacamole. I think we ate guacamole almost every day. It's so fresh and amazing.
 2. Paletas. We both got coconut and again, these were so fresh. These are definitely not as sweet as in the states, as we found true of most desserts. But that makes them even better!
3. Coco Frio! AKA a cold coconut with a straw. Yummy and cheap.
4. And lastly, elote or street corn- eat it where ever you find it. The corn that we had was so good and the texture of the corn was way different than any corn I've ever eaten. The corn was more dense and chewy. So delicious! I mean I would've eaten this everyday if we were near it. I had chile on mine and it was pretty spicy (and I like spice) and Casey had no spice. Again, I can't stress how different the corn was enough. It's kind of mind boggling, but you have to get some!

If you liked this post and would love to see more like it, please pin the image below!

xo, Savannah

P.S. Well we are 3/4 of the way done with the Guide to Tulum series! Next week we will be talking about what to do while in Tulum.


DIY Stock Tank Pool: Everything You Need To Know


Let me start by saying that this project is not for the faint of heart. I don't mean to discourage anyone from doing this project, as long as they know what they are in for. There are many things that could go wrong during setup (I am a witness to this), so there could be a lot of troubleshooting. Anyway, I'm here to hopefully save you some trouble by telling you all the things that went wrong for us and how we fixed them. This should make it way easier for you!


Other posts you may be interested in:
- 10 Most Frequently Asked Questions About Stock Tank Pools
- DIY Painted Tile On Concrete
- DIY Stock Tank Pool Bench
- How To Paint Your Stock Tank Pool

We had our stock tank pool last year and it was set up by our landscaper (who also does ponds.) We knew we wanted our pool to be chlorinated and with the mosquitoes here in Tennessee, we definitely didn't want standing water. This is where a pump comes in.

Our landscaper used a pond pump/waterfall pump and we soon discovered we needed something else. We dealt with the pond pump through the summer, but knew we would get a filter pump (for real pools) this summer. Without it you are left with sand/dirt/tiny molecules of things that aren't being filtered out. This made us drain and refill the pool way more than we wanted to. The whole purpose of the pump is to not have to refill the pool all summer because the water is being cleaned.

When I ordered the pump, I realized that a lot of random parts don't come with it. It came with the input parts, but not the output parts. So I've made a list of exactly everything I purchased to make this happen.

Things you will need:
- Stock tank (size of your choosing- ours is 8 ft. and we got it at a local co-op. Here is a plastic one.)
- Above Ground Pool Pump
- Weatherproof Silicone Sealant
- 1-3 Rubber Washers (or Gaskets)
- 1 Strainer Nut

Other things you will need for maintenance:
- Chlorine Tablets
- Floating Pool Dispenser
- Water Testing Kit

The pool pump setup guide packet says you only need 2 rubber washers (the pump comes with 1), but I ended up using 3, and you could end up using 4 depending on preference.

In lieu of step by step pics, I recorded a video of the process. The steps are listed below, but I hope this visual is more helpful!

Step 1- Find a nice level area to lay the stock tank on. If the area where you have chosen isn't level, use sand or rocks to build up whatever side needs it. It is very important that your stock tank be level so there aren't any unexpected leaks.

Step 2- Cut holes in your stock tank. I'm not going to lie- this is a pain in the butt. We bought a hole saw with an arbor and it took two people to get through the metal. You will need two holes, one at the top and one at the bottom. In an above ground pool, these aren't usually right on top of each other, but ours are. We haven't ever seen this as a problem.
Step 3- Start assembling the parts. In the pool pump package there is a packet with instructions, warnings and troubleshooting. This packet proved to be vital in the setup of the pool. I did end up getting 2 gaskets for the bottom section (the drain section), one for the inside of the pool and one for the outside. It only says you need one for the inside, but this was causing a drip for us. I also put thread seal tape around the connections that were closest to the pool. There are a lot of connections, and each one has a gasket, so you could probably get away without the tape. I didn't put it on all the connections, the only ones that really seemed to matter were the ones that are connecting the hoses to the pool.

Step 4- Apply silicone waterproof sealant around all crevices involving the input and output parts. I did this on the inside of the pool and the outside. And I applied it VERY HEAVILY and did two layers, allowing one to dry before the second was applied. Sealing these crevices is one of the most important parts. This is what is going to keep the water in the pool. Well all of these steps are leading up to keeping water in the pool, but if there is any chance that it's going to be getting out, this is what will save you.

Step 5- Test for leaks. Before I added water to the pool, I took a water bottle and poured a good amount of water on the input and output parts. You could also just use a water hose. I would make sure the hose wasn't on full blast. You don't want to accidentally penetrate the sealant.

Step 6- Once you are sure there aren't any leaks, fill the pool just above the bottom hole/output. Check again to see if any leaks have started. If there aren't any, fill the rest of the pool up!

Step 7- Turn the pump on. Make sure both plunger valves are open/unlocked. When you first do this water may not come out of the output, but there is a solution! Twist off the knob on top of the filter pump to let some air out. Some water may escape too and that's okay, just be ready to screw it back on as soon as the water starts coming out.

And then you are done!
Since I had many problems while setting up, I'm going to list them below and tell you how I fixed them.

1. Cutting the holes too big. We cut our holes 3 inches across because there were only two hole saw sizes at our Home Depot, one 2.5" and one 3". The parts are about 2 3/4" so we went up. Ideally we would've realized that we just needed to go to another store, but at the time 3" made sense. This caused a lot of dripping problems because there is a small gap between the edge of the hole and the input and output pieces. We combated this problem by adding another rubber washer/gasket on the outside of the pool, before the nut is screwed on. Plus plenty of silicone sealant!

2. Not making sure the pool was level. We actually just had our concrete poured before we set the pool up so the ground was sure to be pretty level. Where we placed the pool was pretty level, but apparently it dipped down a little in the area where we had the holes. This caused all the water pressure to be leaning on the same wall, so there was leaking no matter what we did. All we did was rotate the pool and put a thin piece of plywood under the edge where the holes are and this leveled it out!

3. Using foam sealant to seal the crevices. No. Just no. Our landscape guy did this last year and it worked, but this year when we changed out setup, it never helped. First off, if you are going to use foam sealant, make sure you get a polyurethane based one. The other ones simply don't cure. I originally used one without polyurethane and I left it for 10 hours and it still hadn't cured. No thank you! Also, silicone sealant does a way better just, maybe just because it's easier to get it in the crevices since it doesn't expand. Wear gloves! Everything mentioned is extremely sticky and will become part of your skin.
If you liked this post and would like to see more like it, please pin the image below!

xo, Savannah

P.S. Want to see how we painted the lounge chairs? Check the post out here!


**This post contains affiliate links.