

I came up with something that you could order online and have delivered straight to your door, and it's only two products that add up to under $100.
For this project you will need:
- Shelf
- Lights
- Scrap wood pieces
- Yarn or String
- Timer (not necessary, but convenient)
If you want to get fancy and more hands off, you could purchase a timer like we did. I used scrap wood and yarn that I already had, so you can probably find something around the house to use instead of those things. Anything that is straight and rigid could be used. Think scrap metal, extra PVC pipe, wood, etc.


You also need to have a specific kind of light. I did a lot of research about what kind you need for your seedlings and found these lights that replicate the perfect amount of daylight.

If you are in a place where you really have to consider your electricity use (like most of us off-griders) these lights use 20W per light. That isn’t too bad when you are talking about 1 light, but having more lights will start to add up. You could certainly nix the lights and put the shelf near a window and rely on daylight itself. But if you have the power, this setup will use about 160W per hour it’s on. A good solution might be to use the daylight in the daytime and then use the lights when the sun goes down. It’s important for your seedlings to get about 14-16 hours of daylight, so the supplemental light would be really helpful.
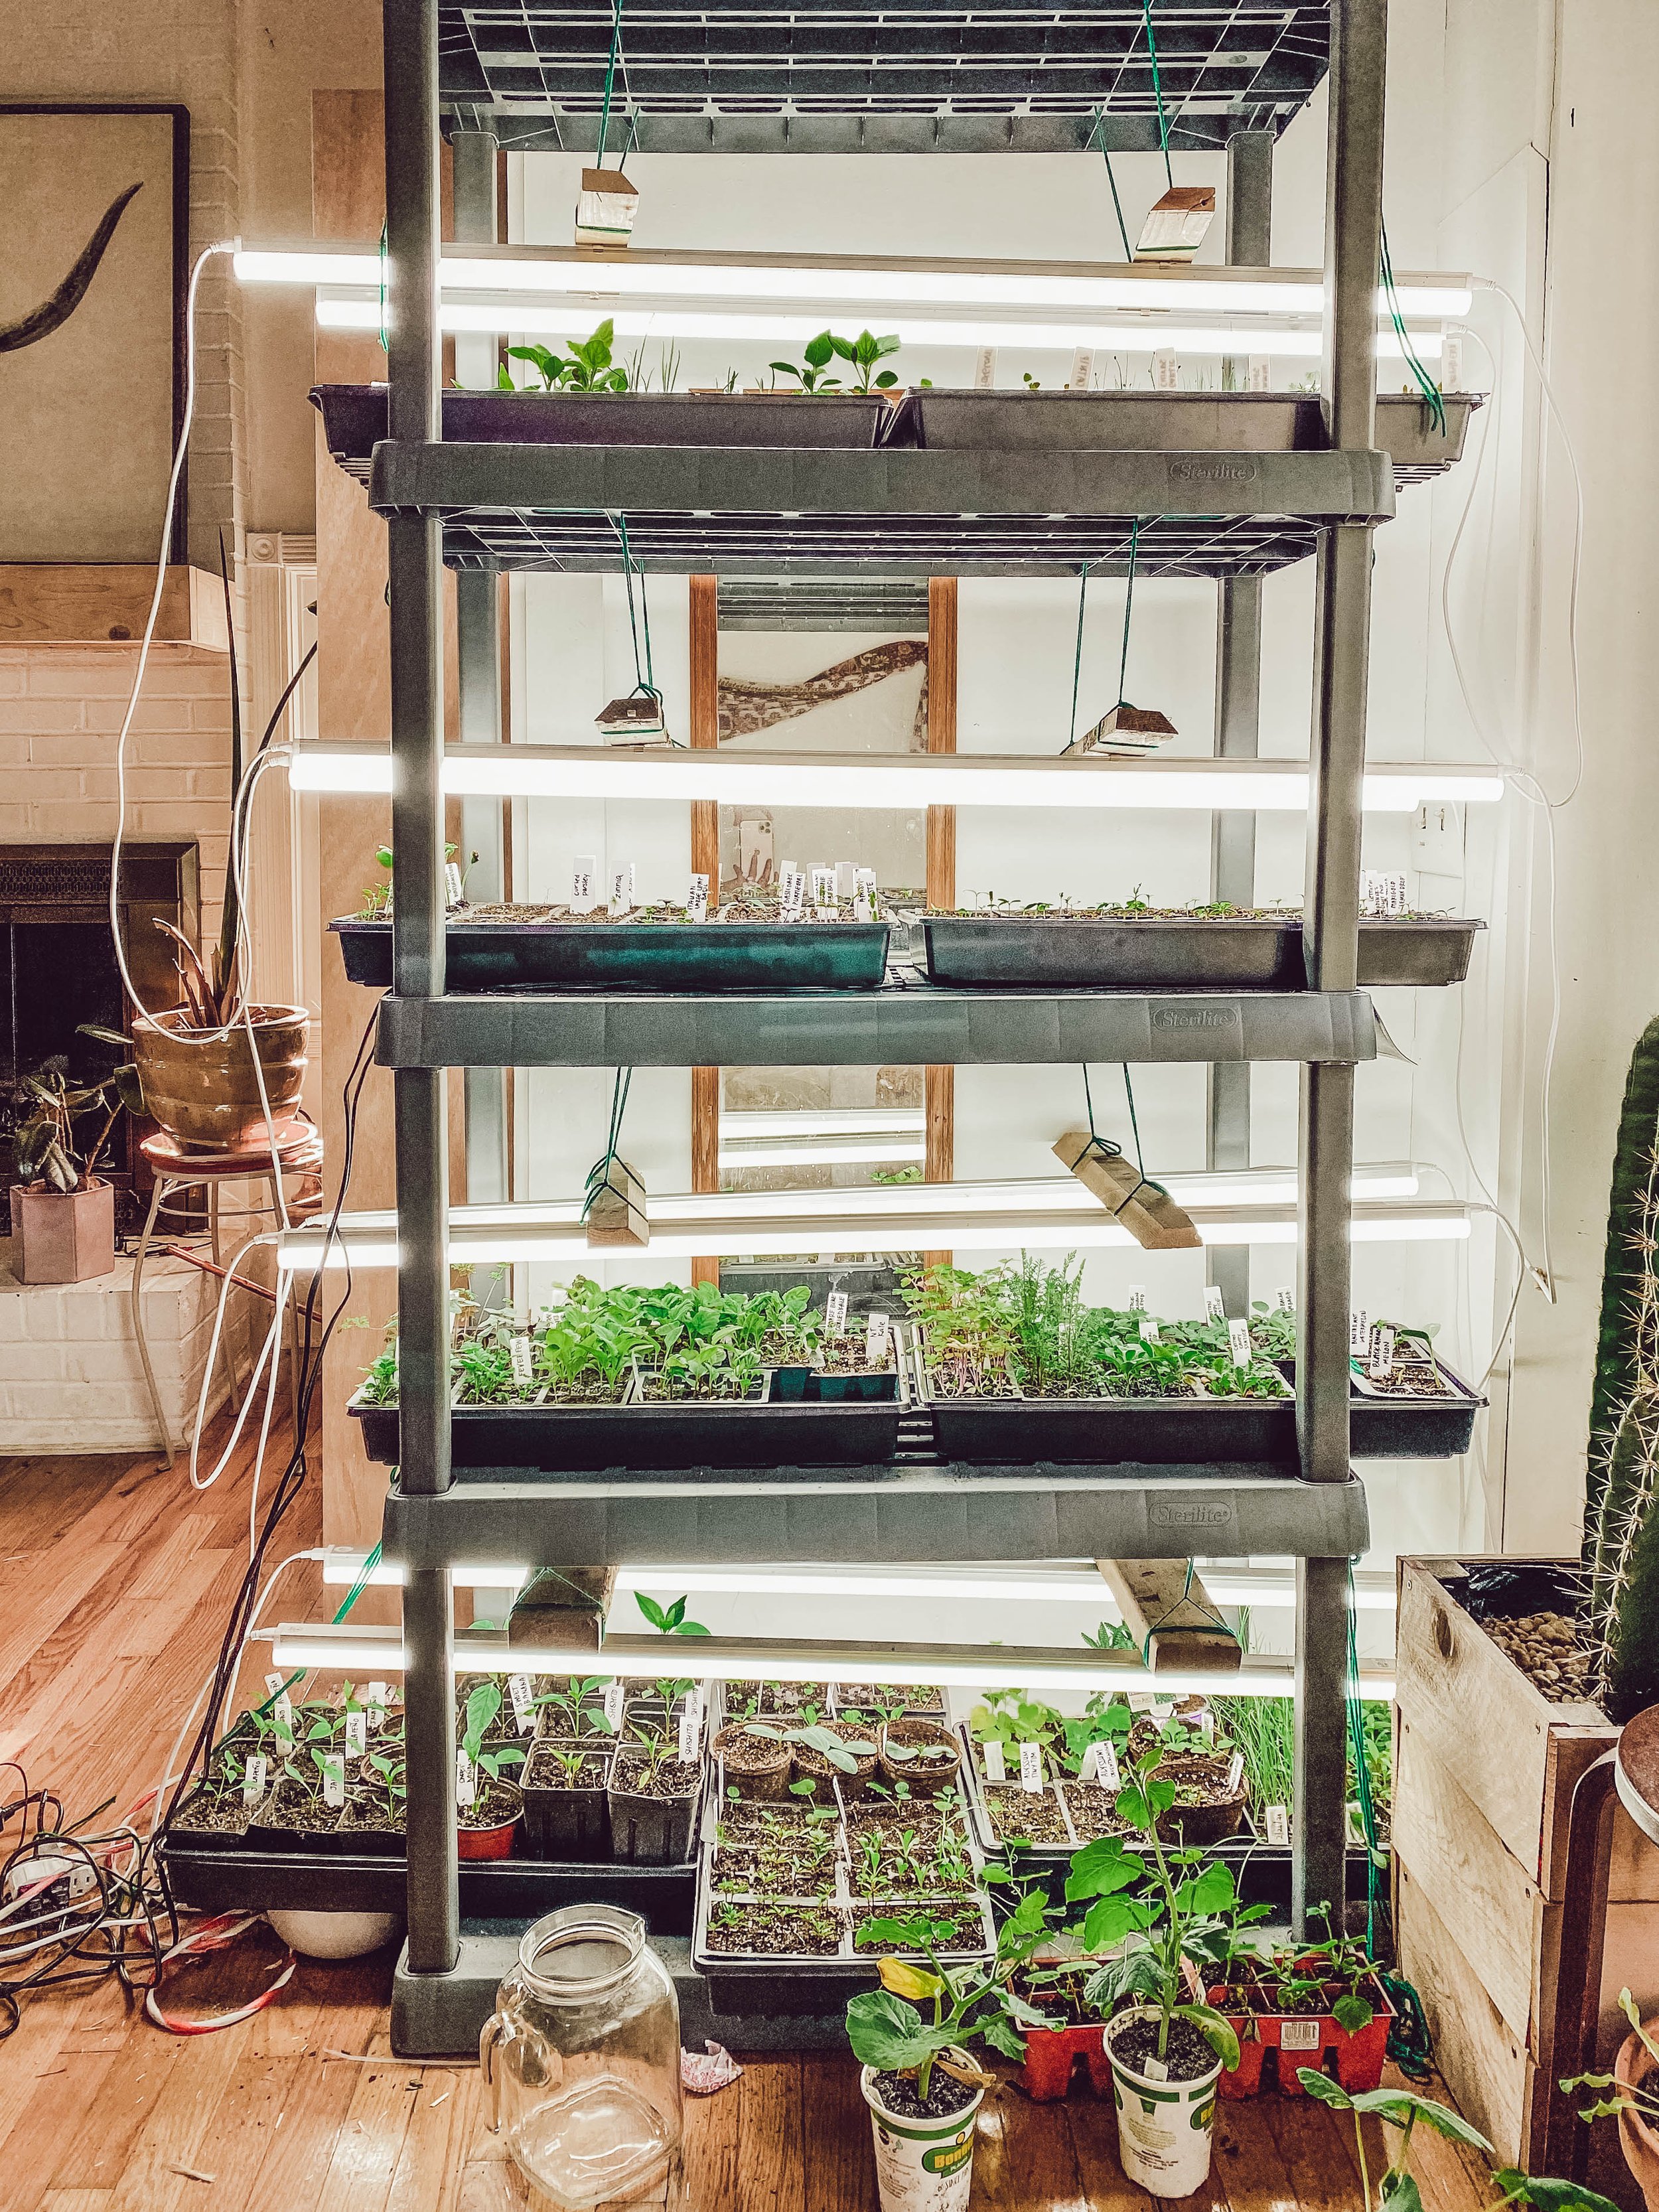
Once you have your shelf and lights, all that's left to do is assemble your setup. First start by assembling the shelf, which is very simple and self explanatory.

Next, use the provided light clips and attach them to your materiel of choice. Because I used wood, I just screwed the clips onto the wood without pre-drilling. If you use another material you may have to pre-drill a hole.
I have 8 lights over 4 shelves, so I need 8 pieces of wood. Each wood gets 2 clips screwed on in the exact same place on each piece. This is so I can attach 2 lights.
Once the clips were attached, I clipped in the lights. Make sure the wood pieces are spaced out toward the edge rather than the middle. This part can be a little finicky as the clips can get stretched out when you screw them in. When this happened all i did was pinch the two side pieces together. Once you get started on this project, you will really understand what i mean.
The lights can all be connected together with the provided cords. There are instructions, but it’s pretty intuitive also. One light will have a cord with a plug on it and then the rest connect to each other with the interconnecting cords.

I tied four pieces of yarn on each set of lights- two on each end. Then I took the yarn and looped it through the shelf above and tied them as evenly as possible. I also only tied them with a bow (not a knot) so that i could untie them and lower or raise the lights as needed. When you start your seeds the lights will need to be really close to the soil. As the seedlings grow you will need to raise the lights higher so they don’t burn the tender leaves.
And that’s about it! You could really do this with any shelf you already have and just buy the lights. I know when I did some research for something similar to this that you didn’t have to DIY, it was pretty expensive for some lights and a shelf. The key is getting the correct lights that mimic daylight. Warm lighting will not work here!
 Let us know if you try this DIY and how it works out for you! Leave us any questions in the comments below. Thanks for reading!