How To Float The Harpeth River In Nashville (FREE)

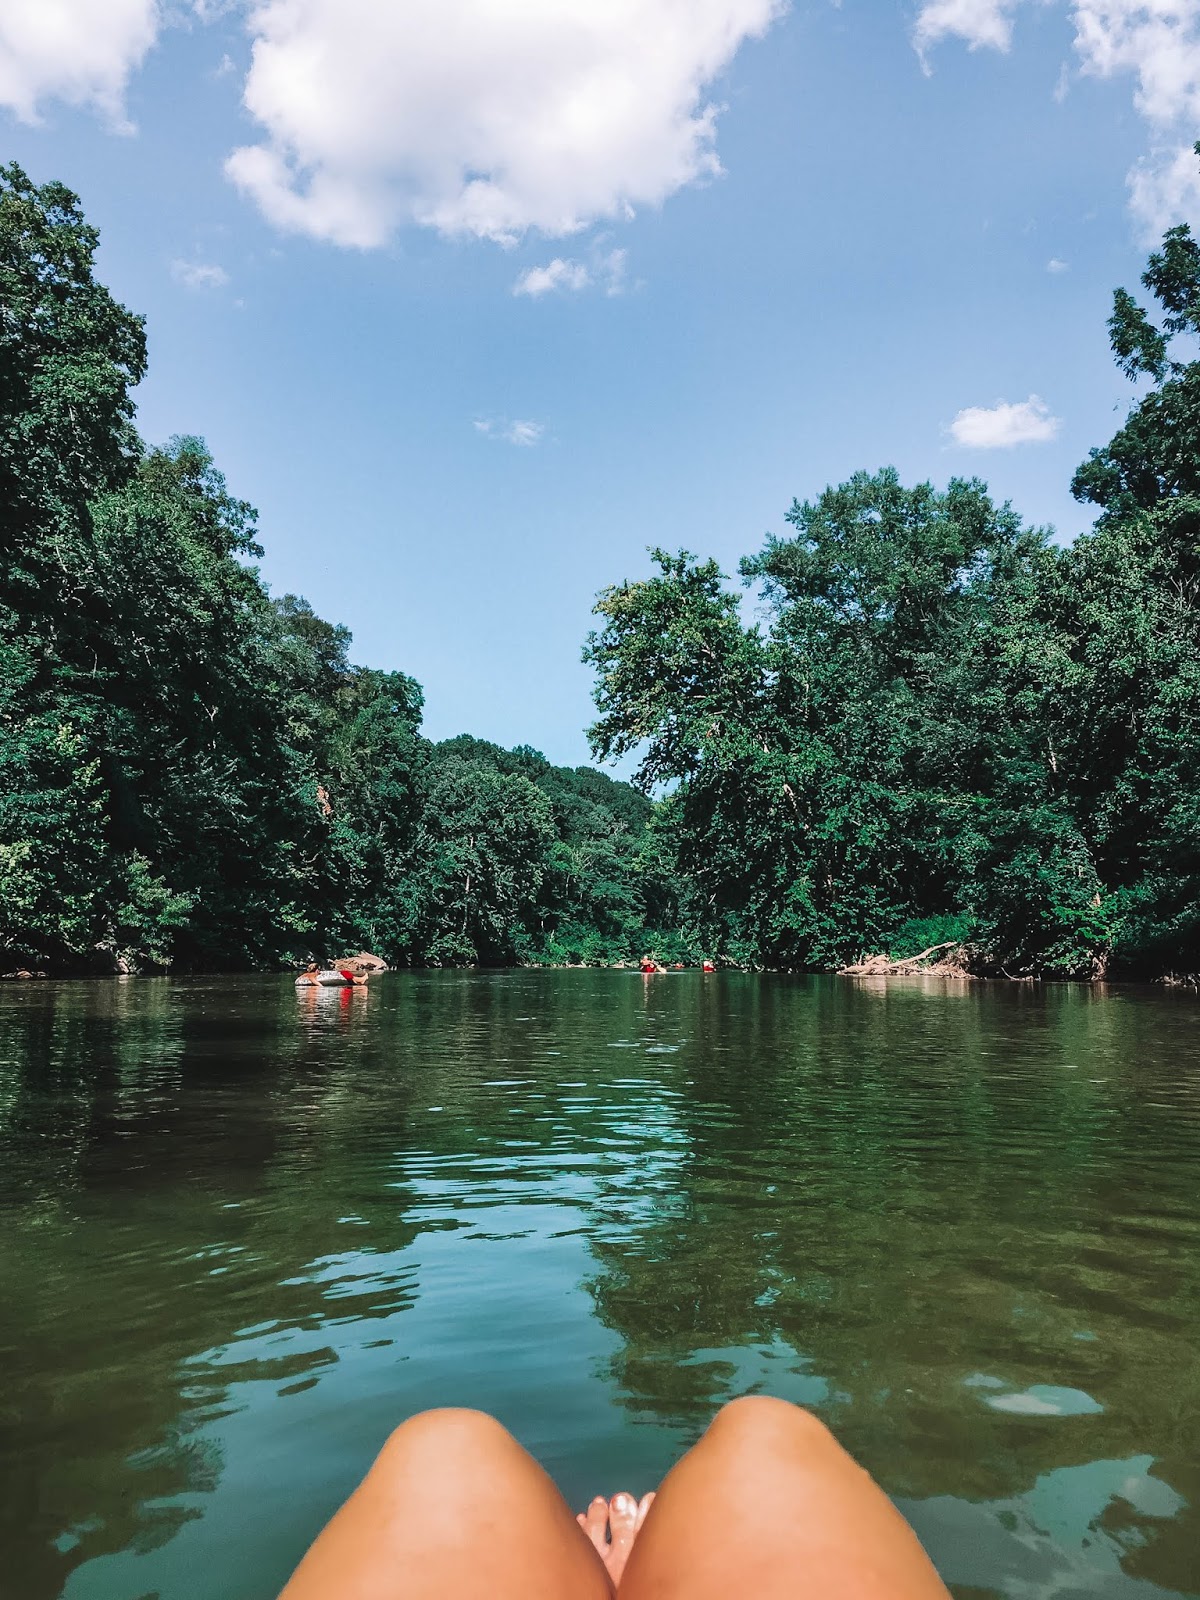
Every summer we have a list of things that we love to do for the maximum Nashville summer experience. One of those things is floating down the Harpeth River. Something we have realized this year is that people do now know about this really fun (and free) option! Both times we've been this year we haven't seen anyone else in floats, only people in canoes or kayaks. And every time we hear that they didn't know floating was an option. Well guys, we are here today to tell you how to do the float, where to go, what to bring, and how to figure out if it's a good time to go.

First off, you are going to need a tube. (Side note, before I moved to Nashville, I had always called this activity "tubing".) And you don't want a rinky dink tube that's going to pop if it touches rock. You are going to want a pretty hefty tube. We have gone through a couple different tubes over the years, but the ones we have now are on their third year, and they were $5 at Walmart.

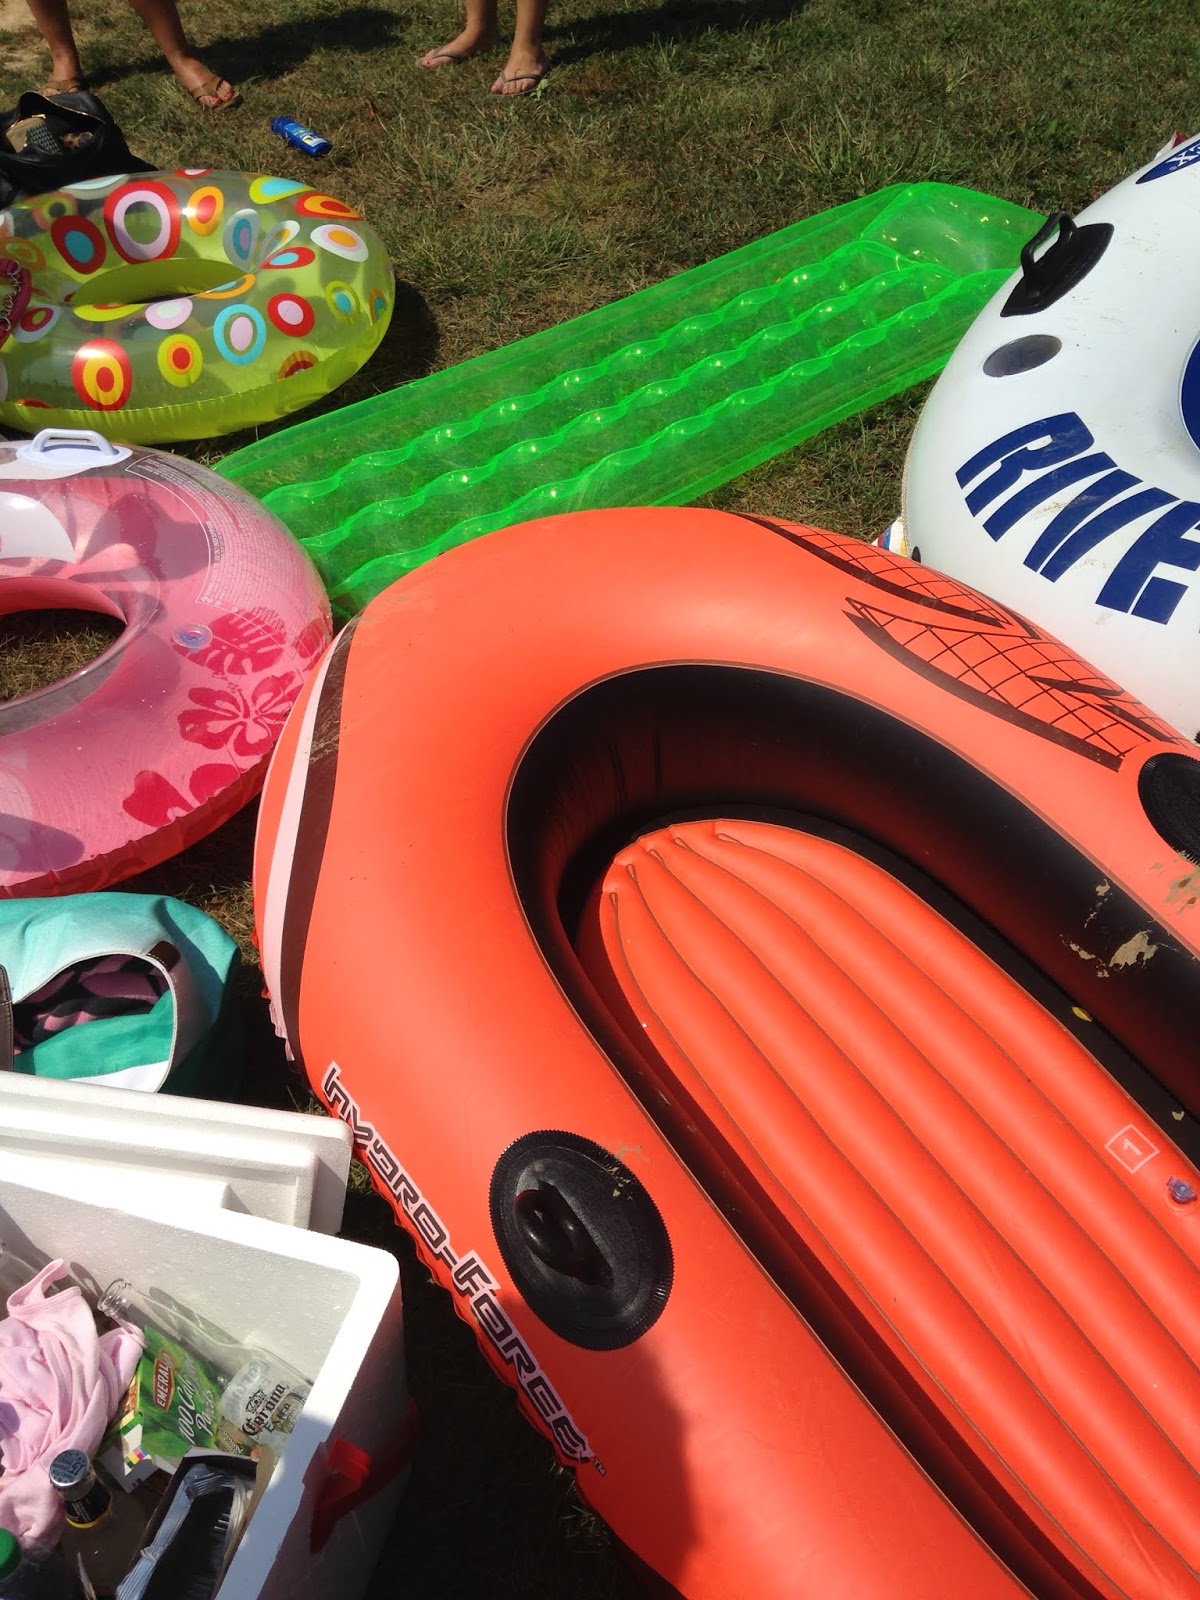
Now, grabbing a tube at Walmart is a great option, if they have the right thing. And I'll add that the tubes were on sale for $5, that wasn't the original price. But if they don't have what you need/want, there are plenty of great options on Amazon. As you can see in the photo above, people use all kinds of floats, but the main rule of thumb is that it needs to be a thicker tube- it may even say it's for the river. Other options that you can choose from are 1- tubes that have a bottom (or don't), 2- tubes that can connect to other tubes (a.k.a. they have little latches attached to your float by strings that click into other people's latches if they have them) and 3- a head rest or no head rest.
These are all personal preference, but our tubes are open at the bottom and have latches to connect to other tubes and no head rests. Don't get caught up on what kind of tube you get. Just get one that isn't going to pop and you will be happy on the water!

And then you'll want to get a waterproof bag to keep things like cell phones, snacks, and keys in. We always keep our phones in waterproof cases and then keep those around our necks or in the waterproof bag. I would not recommend just putting them freely in a waterproof bag unless your phone is waterproof and you don't plan on opening the bag during the float. You definitely don't want to drop your phone in the river! Or just leave your phone in the car! Just play it safe.

And one more thing! Water shoes are recommended. The bottom of the river is rocky, and it just makes it easier if you have something on your feet. We use tevas, but any water shoe will do.
Now let's talk about how you are going to get there and what you do when you do. First of all, you have to figure out how long you want to float. There are 3 main different floats I'm going to tell you about. The one we always do starts in this parking lot in the photo above. This is the Highway 70 Canoe Access entrance. You will need to have two cars because you won't start and end at the same entrance. This is why you go with multiple friends! JK, you go with friends because it's fun, but it also helps with the transportation part of the trip.

So for this trip you will take both cars to this parking lot (Highway 70 Canoe Access) and unload all the stuff you will be taking with you on your float trip. This usually includes your float, a water bottle, and a waterproof bag. We always fill our tubes with air in the parking lot and deflate them when they go back in the car. They take up a lot of space if you do it before you arrive. So an air pump that plugs into your car is a great thing to have!
Once everyone is ready to go float, the two drivers will need to take both cars to the Gossett Tract parking lot. Leave one of the cars in the parking lot and then both drivers take the other car back to the original parking lot.

Then head down to get into the water. You'll walk down this ramp to the right of the bridge and there will be stairs down into the water.

Hop in your float and let the water float you down the river! You will be floating away from the bridge.

Now how do you know if it's a good time to go floating? You'll have to check the water levels on this website. Scroll down to the "gage height". Anything between 1.5 and 3 is a good time to go. If it's under 1.5 the river will basically not be flowing and you'll be in for a very long trip. You may even have to walk part of it because it's too low. We went a few weeks ago at 1.5 and it was great! The whole trip was about 1.5 hours long, and we didn't have to walk. I did get stuck on some rocks in one section, but I was able to push off that area very easily. We went on a float trip this weekend and it was at 2 and the we were moving way faster, but somehow the trip ended up being about 1 hour 40 minutes long.

How do you know when to get out of the water? You just look for the sign that says "Kid Trip Exit". There's a little rapid right before this section and it shoots you right to the edge, so it's not hard to get out at all. The rocks gradually go into the water and create a sort of staircase, so it's pretty easy to get out! You walk up the stairs to the left and you're in the parking lot where you left the second car!

We usually leave all of our towels in this car so we can all start drying off while the two drivers take this car and go grab the car from the other parking lot. Then your float experience is over.

There are a couple more options for floating longer.... You could start your float at the same place where you just ended and then get out at The Narrows of the Harpeth. We've never done this float, but I believe it's about the same distance as the first float. You could add them together or just do one or the other. There are many options!

And you can also start at the Narrows parking lot to do a significantly longer float. If you only have one car, this is a great option, although you have to really commit to floating as it could take anywhere from 4-8 hours to complete the loop. The benefit is that when you get out, there's a little hike through the woods that takes you right back to the same parking lot you started in. So two cars are not needed.

If you decide to add the first two floats together or do the Narrows loop float, you will want to bring provisions. A floating cooler is a great option to keep the drinks cold on a hot day! Which I'm assuming it will be, because that's why we are all floating anyway right? Because it's so hot out!

One last thing to note is that the park does actually close and you can't be in the water past 7 PM. So make sure you check the water and plan your float accordingly. They usually don't let people start floating the big Narrows loop past 1 PM.

I hope this post answered some questions for you and that you now know how to do a float on the Harpeth River! It's seriously one of the things we most look forward to in the summer, so we hope you all come to enjoy it as well!

How To Keep Your Stock Tank Pool Water Clean

So you've DIYed your stock tank pool and enjoyed using it a couple times, and then all of sudden it starts to get a green tint. Don't fret! This can be fixed! And you don't have to drain your pool....

Our pool water has looked like this at least once a month since it's been warmer outside. But the water in our pool is the same water we filled our pool up with when we made it into a hot tub in the winter. Today we will tell you everything you need to know to keep your water looking fresh, crystal clear, and blue!

First of all, your pool water should never be green, or even have a hint of green. If you see green, something isn't right with your water. At it's best, your pool water should be a pretty pale blue color and it should be crystal clear. But also remember that when you swim in the pool, your body oils and sunscreen get into the pool, so it's going to need some maintenance.

You'll want to keep a few supplies on hand to keep your water in tip top shape.
(These are affiliate links.)

A skimming net
Water Test Kit
pH minus and/or pH raiser
Broom
Chlorine Tablets
Chlorine Dispenser
New Filters

Step 1. Test the water. Follow the directions on your kit, but it usually involves filling the tubes with water, adding drop, and waiting to see what the color of your water means.

Step 2. Balance the water. If your pH is too high or too low, you will need to use pH minus or pH raiser to fix that. I've only ever had to use pH minus, and I probably only have to do that twice a season. If the pH isn't right, the chlorine cannot be used properly! So make sure to use the chemicals when you need them, and follow the instructions on the bottle.

Step 3. Add chlorine. If your test reads that you need chlorine, you need to add some tablets. If your pool is really green or cloudy, you make want to look into getting some pool shock, or liquid chlorine to add to your pool. I have found that this is necessary

Step 4. Remove all debris. Including over the drain. Take your skimming net and catch everything that is floating in the water and empty it outside of the pool. Also use your hand to grab and remove anything that is stuck in the drain grate.

Step 5. Replace dirty filter. This is pretty self explanatory, just make sure you turn the plunger valves to the lock position before you open the pump and open them before you turn the pump on.

Step 6. Run the pump. If the pool is a normal dirty, I'll just keep the pool running on the 4 hour time cycle. If it need a little more love, I'll turn it up to 6 hours.

Step 7. Sweep. And don't forget about the sides! Sweep every surface that is in the water. If your pool is green, you will see green bits moving around in the water as you sweep. Just make sure you push all of that over towards the drain outlet. If your pool isn't painted on the inside like ours is, the bottom of your pool will get slimy when green. And it will be harder to see on the shiny silver of the stock tank pool. Since our pool is white, I can see the moment algae starts to develop, and it doesn't get slimy.

Step 8. Wait for the pump to do it's job! The pump is a magical thing. And it will clean your water beautifully if you've prepped your water like we've just talked about.


If you follow all of these steps, you will have clean water in one or two pump cycles (depending on how dirty your water was). I've been able to turn around some pretty dirty water in our pool by doing these things. But you always follow the steps above even if you pool isn't green. I could probably remove debris from the pool every other day, but I end up doing it about once a week. The faster you remove the debris out of the pool, the less the filter gets filled up.

We are working on a new stock tank pool FAQs post so I'm curious.... what questions do you have? Leave them in the comments below so we can make sure we answer them.

If you liked this post, please pin an image from the blog on your Pinterest account!

Happy swimming!

Transforming Our Home Studio to a Boho Modern Farmhouse

You guys, our studio has looked like a scene a from a disaster movie for months. This room has gone through a lot of transition since we've moved in over 3 years ago. First, it was set up as place to make clothing because at the time we were making hand dye kimonos. So there was a very large work table in the middle of the space.

Then we had a professional organizer come in and sort out all of our mess. This room also houses our washer and dryer which is one of the big reasons this room turns into a disaster. If we don't stay on top of our laundry (like serioulsy keep it tight a.k.a. nothing ever left in the dryer) the rest of the room just falls apart.

If you'd like to see our studio's transformation story from when we first moved in, click this link here. It's definitely worth a gander!

When the organizer came, we were also doing Airbnb upstairs so we had even more of a major laundry crisis. We were changing sheets every single day, which means we had at least one load every day. Our organizer helped us get a system that worked for our clothing business and all its supplies and deal with our major laundry issues. That system worked well until we stopped making clothing and stopped doing Airbnb.

We wanted to turn the studio into a workspace that would work better for our current needs. So Savannah turned our giant work table into a desk. You can see that DIY post here.


This was the way the room stayed for a while, however we found ourselves not using our desks for work very often. We would end up sitting in our living room on the couch or we would sit at the dining room table. The studio just wasn't completely flowing. We knew we wanted more for this studio space.

Ashley Home Store has a group on Facebook that we are part of and they were doing a contest late last year. They asked people what room they wanted to redo and what ideas they had for that room. I instantly knew that room was the studio for us.

I went on their website and saw so many things that would make our space more of what we needed. So I responded with my ideas and we ended up being one of the people who were selected to participate in their project. We were pumped because this would be the push that could get this room to finally shine! So without further ado here is the finished product. We are very happy with the end result.

We can even host large groups in this space!

If you live in an older house like we do, you probably have experience with weirdly shaped rooms. This room is one of those. The sectional we chose is great because you can move it around into many different lengths. This room is not symmetrical at all, but this sectional somehow balances it all out. If you don't have enough space for this large sectional, they also have a couch version!

We were able to fit so much seating in the room while maintaining the flow of the walkways, AND we still have our desk area!

This cabinet is actually a DIY I did (and am not completely done with yet) and one day I will do a blog post about the process.

You can see our rug from Ashley in this pic, but really Daisy was posing right there every time I went to take a photo, so here is her close up!

Okay, so I bet you are wanting the link for something in our studio, and I'm going to do my best to link all of them for you below!


How To Paint Your Stock Tank Pool

I know, I know. This stock tank pool is stinkin' cute. When Hunter and Cameron Premo told us they wanted a stock tank pool, we knew we had to do something really cool. Almost immediately I remembered our Airbnb in Lisbon, Portugal. It had pink and white striped floors and Casey and I were obsessed.

Now the pink on these floors was very pale, you almost can't even see it in the photos. But ever since this trip, we've tried to find a place to put pink and white stripes.

You can almost see the stripes on the floor here, but you get the point! We proposed the idea to Hunter and she and Cameron were 100% on board. We finally figured out a cool way to incorporate this inspiration in a project!

Hunter chose a beautiful pink (that you can actually see). The color is called Everblooming by Behr.

So the first thing you need to know about painting your stock tank pool is that you should not paint with regular paint or spray paint directly onto the metal. The paint will chip and repairing it is basically impossible. We've talked about this before in a previous post where we coated the inside of our pool. You can read that post here.

What you have to do is coat the metal with a rubber coating first. Once you've done that, you can use regular paint on top of the rubber layer on the outside of the pool. On the outside you can use regular paint after coating it with Leak Seal. Leak Seal is designed to be able to painted directly on galvanized metal unlike most paints. So let's get started on how you do this!


Things you will need:
- Leak Seal
- Outdoor Paint in color of your choosing
- Comfort Grip
- Painter's Tape
- Measuring Tape

Step 1. Prep your surface. Per Leak Seal, you don't need to do anything special to prep the surface of the galvanized metal. They do recommend that you wipe it down and make sure there isn't any dust or dirty on the surface.

Step 2. Spray on the Leak Seal. We suggest getting a comfort grip for your cans as your hands will get worn out from pressing the nozzle on all the cans. The inside of your pool will take about 3 layers of the spray if you want an opaque color. You have to wait 30 minutes+ between each coat, but make sure you read the directions on your can and follow accordingly.Once you have all the coats you'd like on there, you have to let the coating cure for 24 hours.

Step 3. After the Leak Seal has cured for 24 hours, add your paint color. We coated the outside with white paint before painting on the stripes.

Step 4. Measure out the stripes and tape them off.

We decided that we wanted the stripes to be 10 inches wide each, so I first made a mark around the top of the pool every 10 inches. I then started taping in the back of the pool. There would end up being one smaller stripe and we wanted that to be hidden! Alternate taping two pieces of tape on the insides of the 10 inch markings and then 2 pieces on the outside of the markings. It should look like there are smaller stripes, but these are the ones you don't paint.

Step 5. Paint the stripes! Brushing the paint on will feel a little strange on the rubber layer, but this is right.

And the moment you've been waiting for... revealing those beautiful clean stripes! Make sure you peel the tape off once the paint is dry to the touch, which doesn't take too long. If you leave the tape on for days, the paint can peel off with the tape.

Let the paint cure before moving your pool or cutting the holes for the pool pump. We messed up the paint a little because we didn't wait. Luckily, it's in a place where no one will see!

Once the paint is cured, you are good to fill up the pool! If you need to know how to DIY your own stock tank pool, we have a blog post with all the steps and details. You can read that here!

Go see how Hunter styled her pool (and her cute dogs who also love the pool) over on her blog here! (**The photo of Hunter is by Cameron Premo.)

And check out our latest video where we take you behind the scenes of us painting and setting up their pool!

**You will notice that we painted the inside of Hunter's pool. At this time we do not recommend that since Leak Seal now does not recommend using this paint in areas where it will have prolonged contact with water. So we only recommend using Leak Seal on the outside of the pool.**