four BEAUTY TRICKS YOU NEED TO KNOW

We though we'd share some beauty tricks with you that we use on a daily basis! Some are things we've known for years, some are new tricks we just couldn't keep to ourselves. We hope you enjoy them as much as we do.

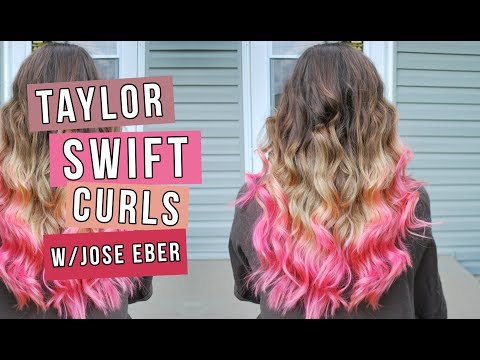
1. Sleep with you hair in a loose top knot. I just twist my hair into the loosest bun possible and secure with a loose hair tie. If you sleep with the bun at very top of your head, your hair will have some extra body in the morning. Make sure your hair is dry before you do this.

2. When you run out of mascara, wash the old wand and use it to brush you eye brows and separate your eye lashes after using mascara.

3. After you've painted your nails, it's always so hard to tell when they are really dry. Sometimes they seem dry to the touch but 5 seconds later you have a dent in your nail. SOLUTION! When you think your nails are dry, just tap two of your nails together. If there is any resistance, your nails are not ready for you to be moving around a lot. If the nails don't stick to each other at all... you are good to go!

4. If you have some shoes that rub on your ankles, don't reach for the bandaids. Reach for some Vasoline/Petroleum Jelly of your choice. Rub a little amount on your ankle where the back of your shoe will touch. Don't put too much or it will get on your shoes. This trick is amazing because it really really really works!

What are your favorite beauty tricks? We might try them/put them in another post!


the RAVE: JOSE EBER TRIPLE BARREL CURLING IRON

We were thrilled when Jose Eber contacted us and asked if we wanted to try out their products. We've been wanting to try out a curling wand for the longest, so that is what we chose to review. Holy moly, we LOVE it. I (Casey) have a hard time curling my hair because it never curls the way I want it to curl, and the curl never stays. Well the triple barrel curling iron has made all my super straight hair dreams come true. Watch the review Savannah and I did in the video below:

Some pictures of Savannah's results:
DSC_0594-5
DSC_0596-3
As you can see (from the video) Savannah and I had very different results and that's one of the things I love most about this curling iron (she looks all Taylor Swift-y). You can get so many different types of curls and waves depending on what barrel you use and how you curl your hair.

Have any of you lovely readers tried any of Jose Eber's products? What did you think? Tell us how much you'd love for them to do a giveaway and maybe they'll make your dreams come true.


**These opinions are 100% our own. Jose Eber has not paid us for this review**

manic MANI MONDAY: KIKI LA RUE INSPIRED

Today's mani was inspired by two pieces from Kiki La Rue.

To learn more about the Kiki La Rue boutique check out our current giveaway.
You could win a $50 gift card!

Photobucket
Let's get started...

Photobucket
Paint your nail pink.

Photobucket
Take a navy polish and swipe the brush from the middle of your nail to the upper left corner of the nail.

Photobucket
Then swipe the brush from the middle again to the upper right corner of your nail.

Photobucket
You will have created a chevron shape on your nail.

Photobucket
Do the same with a white nail polish. You can add as many stripes as you'd like.
I made each of my nails different.

Photobucket
Clean up around your nails. I am using this new Cutex Corrector Nail Polish Remover Pen I got. It's one of my new favorite things fa sheez.

Photobucket
Cover with a top coat and you are done!

manic MANI MONDAY AND A GIVEAWAY! (CLOSED)

DSC_0566-2-1
We are super excited about this giveaway! I love the idea of having this fun damask design on my nails without having to wait for the polish dry/ having to create the design in general. Below I have created a tutorial on how to apply these nail shields from Jamberry Nails. The ones that I have on my nails are called Sunflower Damask and they were provided by our new friend, Tamara Bennett. Check out her Facebook page too. You could be trying one of the many designs from Jamberry for free! Just read on to see the tutorial and learn how to enter the giveaway!

DSC_0525-2
These are the nail shields as they come. Depending on your nail size situation, you could use this sheet for 2 manicures. The nails on my right hand are bigger than the nails on my left hand which....I just learned while putting these nail shields on. It's. Weird. Since this is the case, I could get 3 manicures out of one sheet. The shields also come with step by step instructions which, are very helpful.

Photobucket
First, clean your nail with nail polish removed to get rid of any oil on the nail.

Photobucket
File your nails to the shape of your liking and push back your cuticles.

Photobucket
Figure out which size you need for your finger. Once you know, peel back the shield without touching the bottom/sticky part.

Photobucket
Cut the shield in half (if your nails are short.) This will make it easier to place and you can save the other half for another mani, or for your other hand.

Photobucket
Heat up the back of the nail shield for 10-15 seconds to make it more sticky.

Photobucket
Place the shield on your nail. Make sure the shield isn't overlapping onto your skin anywhere. This happened to the first few nails I did so I heated up the shield again with the hair dryer, pulled it off slowly, and placed it in the right spot. It got much easier with each nail I did.

Photobucket
Rub the shield on your nail to help it stick. I just used my finger but Jamberry recommends you use a rubber cuticle pusher. I found that my finger worked just fine.

Photobucket
Cut off the excess shield close to your nail.

Photobucket
File downward against your nail to remove the extra shield. Repeat all of these steps for each nail!

Photobucket
Here are my nails all finished! You could also check out this video for instructions on how to apply these nail shields.

DSC_0564-1

So I'm sure you want to know how you can win your own sheet of nail shields! Here's what you need to do...

1. Be a follower of our blog.
2. Leave a comment below telling us which design is your favorite and your e-mail address. Only one entry per person.
 SIMPLE ENOUGH!

Visit Tamara's Jamberry page to choose your favorite nail shield design.

The winner will be randomly chosen from the comments and must be a follower of our blog.
The winner will receive one free set of nail shields in the design of their choosing.
Winner will be announced Saturday, May 12.

This giveaway closes Friday (May 11, 2012) night at 11:59 PM (central)


the DIY: FASTEST FRIENDSHIP BRACELET EVER

We were super excited to share the Fishtail Friendship bracelet tutorial with you and we are even more excited to share that we've found an easier way to do it. Don't get me wrong, I will still use the original technique to create more intricate designs but, this new tutorial is so quick you will end up wanting to make one in every color combination possible (like we did!) This tutorial is very similar to the other one so I will just share with you the differences.

Check out our latest DIYs!

You will need:
1. You will only need to choose three colors of embroidery/friendship thread. Cut two pieces of each color at around 3 feet each. So total you should have 6 pieces of string. Keep the like colors together.

2. Loop all of the string together around your ring finger and tie two knots.

3. Tape (or clip) the loop to a sturdy surface. Separate the colors. On the left side you should have one group of each color and you should have one group of each color on the right as well. If you separate them like this in the beginning, it will be easier in the next steps.

4. Take the outside color from the right side (in this case- blue) and cross it over to the left side (on the inside.)

5. Take the outside group/same color from the left and cross it over to the right side (on the inside.)

6. Grab the left group in one hand and the right group in the other and pull outward to tighten the design a little. You will only have to do this step in the beginning, eventually it won't need tightening. Repeat steps 4, 5 and 6 over and over again until you get the bracelet as long as it needs to be to go around your wrist. It should go pretty fast.

7. When the bracelet is long enough, tie two or three knots at the end.

8. String a bead onto the end and then tie another knot to keep the bead in place. (I actually tied two knots a the end.) Then cut the extra string off and you are done!

To see more detailed instructions of the end steps please refer to this tutorial.
DSC_0544-1
DSC_0548
DSC_0552
P.S. When we say "Fastest" friendship bracelet ever, we are excluding the regular three strand braid. Obviously that'd be super fast but it'd just look like a braid and that's nothing special (but could work in the right situation.)
xo, Savannah
** This post contains affiliate links.

the DIY: "DIP" DYED HAIR (UPDATED)


*DISCLAIMER- I AM NOT A PROFESSIONAL COSMETOLOGIST/HAIRDRESSER/COLORIST. THIS WAS JUST AN EXPERIMENT GONE RIGHT.*
So if you saw our Candy Hair Color post, you know that Casey and I are pretty obsessed with fun-colored-hair right now. It's not a reasonable obsession but hey, are any obsessions really that reasonable? I decided to take matters into my own hands and give my hair some change. By the way, I really don't recommend trying this at home! It's sort of a miracle that my hair turned out the way it did without ruining my hair. I really don't know what I was thinking but my hair still feels like it usually does, it's just pink in some areas now. Anyways, I'm posting to show you how I did my hair just in case you get brave (or crazy) one day!

photo-11
This is the stuff I used. It cost about $10 for the lightening stuff and the color. It all came in the same box. This already sounds a little shady... only $10?? The cool thing about this specific box kit is that you don't actually have to lighten your hair first. You could just use the color and it would color your hair pink, it just won't stay in very long at all. My friends and I used this box kit years ago to put red in our hair and in the end the red look like the same color on everyone's hair- dark brown, light brown, and blonde. I wanted to try to lighten my hair so that the color would be more permanent. SCARY.

Photobucket
I separated the piece I wanted to lighten first and then I worked my way around my head. I put the bleach about 2/3 of the way up my hair. You could just use a clip but I was trying to be super precise. This is bleach we are talking about.

Photobucket
I put the bleach in lines that started at different places so it wasn't a straight line across my hair. Then I rubbed the bleach into my hair (with gloves on my hands.) Fold the sides of the foil inward and then fold the bottom upwards to keep the foil in place. I didn't buy special foils, I just made my own. I, and Casey too, literally took sheets of aluminum foil and cut them into rectangles. Let your hair process according to the instructions. I left the bleach on my hair for about 45 minutes and got scared so I washed it out. The color I ended up with was a little darker than I imagined but I didn't want my hair to start falling off. In the end it doesn't even matter... it got as pink, or even more pink, than I imagined it would.

Photobucket
After I washed my hair out I dried it completely and started adding the color. I basically did the same thing here that I did to bleach my hair. Add color, make sure it isn't a perfect line and fold up the foil around it.

Repeat until you've done all of your hair. I added the pink color 2/3 of the way up the blonde part (where I just bleached.) You could just color your tips if you wanted. I left it on for 35 minutes which is what the instructions said to do. Well... if you wanted the color to stay in longer than a week or two. Then I washed it and THEN. I. HAD. PINK. HAIR.

DSC_0568-2
This is probably my favorite picture of the new pink hair. I love what it does when I braid it. YAY! Pink hair.

Looking for a less permanent way to add color to your hair? Check out what we did in this post.

UPDATE
My hair is still pink as of July 12, 2012, but it has faded A LOT. It is a very light pink now.